
Wazuh adalah platform security open-source yang memiliki kapabilitas sebagai Security Information and Event Management (SIEM).
Sebagai SIEM, Wazuh bisa menjadi tempat penyimpanan dan pengolahan log yang tersentralisasi pada sistem SMSCrops, baik itu log dari sisi server maupun database. Log tersebut menyimpan informasi yang dianalisa Wazuh secara realtime untuk mendeteksi adanya security event.
Wazuh memiliki kapabilitas untuk meningkatkan visibility terhadap security event pada sistem SMSCrops. Kapabilitas tersebut didukung oleh fitur-fitur berikut:
- Malware Detection Untuk mendeteksi file atau proses berbahaya di dalam server.
- Vulnerability Detection Untuk mendeteksi celah keamanan pada package dan software di dalam server.
- Security Configuration Assessment Untuk mendeteksi miskonfigurasi dan memberikan saran remediasi sesuai best practices.
- Docker Monitoring Untuk memantau malicious activity pada docker container.
- File Integrity Monitoring (FIM) Untuk mendeteksi adanya pembuatan, modifikasi, atau penghapusan file.
- Who-Data Untuk mencatat pelaku yang membuat/memodifikasi/menghapus suatu file.
- Database Monitoring Untuk memantau eksekusi query pada database seperti MySQL.
- Email Alerting Untuk mengirimkan alert via email secara otomatis jika terdapat security event.
Dengan adanya kedelapan fitur Wazuh tersebut, sistem SMSCrops bisa mendapatkan benefit sebagai berikut:
- Mean Time to Detect (MTTD) dan Mean Time to Respond (MTTR) yang jauh lebih baik. Sebagai contoh, Wazuh dapat mendeteksi secara realtime query mencurigakan atau malicious file yang diupload ke server, dan segera mengirimkan alert ke tim terkait untuk segera ditangani.
- Forensik yang lebih baik, secara Wazuh mencatat what, who, when, where, dan how terkait suatu security event.
- Mengurangi attack surface dari segi teknologi dengan adanya rekomendasi system hardening dan patching dari Wazuh.
- Visibility dan traceability yang lebih baik terhadap security event. Wazuh mencatat setiap security event secara tersentralisasi, yang sangat membantu untuk menemukan attack pattern.
Prasyarat Wazuh#
Kebutuhan CPU & RAM#
| Komponen | Spek Minimum | Spek Rekomendasi |
|---|---|---|
| Wazuh Indexer | 2vCPU 4GB RAM | 8vCPU 16GB RAM |
| Wazuh Server | 2vCPU 2GB RAM | 4vCPU 8GB RAM |
| Wazuh Dashboard | 2vCPU 4GB RAM | 4vCPU 8GB RAM |
| Wazuh Agent | - | - |
Wazuh agent hanya mengonsumsi 35mb ram on average untuk beroperasi
Wazuh memberikan rekomendasi spesifikasi 4vCPU 8GB RAM untuk menajalankan ketiga komponen dalam satu server. Rekomendasi tersebut memiliki kapasitas berikut:
- Monitoring up to 100 endpoints
- Storing and indexing last 90 days logs
- Handling up to 25 agents
Kebutuhan Penyimpanan Disk#
Program Wazuh server, Wazuh indexer, dan Wazuh dashboard membutuhkan +-16GB ruang penyimpanan di dalam disk.
Jumlah ruang penyimpanan yang dibutuhkan untuk menyimpan log tergantung pada generated alerts per second (APS) dan jenis endpoint yang dimonitor.
- Wazuh indexer
Untuk setiap endpoint berjenis server (0.25 APS), storage yang dibutuhkan untuk menyimpan data di indexer selama 90 hari adalah 3.7GB.
| Penyimpanan indexer (per server/90 hari) | Jumlah server | Total |
|---|---|---|
| 3.7GB | 3 | 11.1GB |
- Wazuh server
Untuk setiap endpoint berjenis server (0.25 APS), storage yang dibutuhkan untuk menyimpan data di indexer selama 90 hari adalah 0.1GB.
| Penyimpanan indexer (per server/90 hari) | Jumlah server | Total |
|---|---|---|
| 0.1GB | 3 | 0.3 GB |
Sebagai contoh, untuk menjalankan sistem Wazuh setidaknya selama 1 tahun, maka diperlukan penyimpanan sebanyak:
(11.1GB + 0.3GB) x 4 + 16GB = 61.6GB
Kebutuhan Sistem Operasi#
Komponen wazuh membutuhkan 64-bit Intel, AMD, atau ARM Linux processor (x86_64/AMD64 atau AARCH64/ARM64) to run. Wazuh merekomendasikan beberapa sistem operasi berikut:
- Amazon Linux 2, Amazon Linux 2023
- CentOS Stream 10
- Red Hat Enterprise Linux 7, 8, 9, 10
- Ubuntu 16.04, 18.04, 20.04, 22.04, 24.04
Instalasi Wazuh Manager#
Wazuh menyediakan preconfigured Docker compose untuk memudahkan proses instalasi, baik itu untuk deployment single-node maupun multi-node. Oleh karena itu, Wazuh manager akan dipasang sebagai Docker container pada dokumentasi ini.
Wazuh indexer butuh untuk membuat banyak virtual memory area (VMA). VMA digunakan oleh Wazuh indexer untuk mengakses file pada disk tanpa harus memindahkan file tersebut ke dalam RAM terlebih dahulu. Maka dari itu, jumlah VMA pada host harus diperbesar dari 65530 menjadi 262144.
sudo sysctl -w vm.max_map_count=262144Example output:

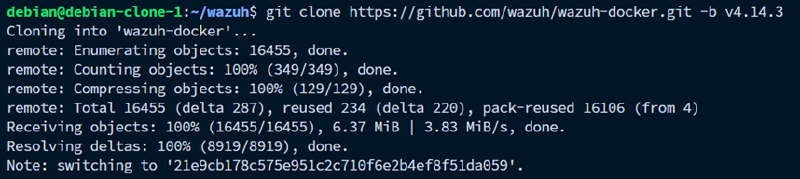
Clone repositori wazuh-docker dengan versi spesifik. Versi terbaru saat dokumentasi ini dibuat adalah v4.14.3.
git clone https://github.com/wazuh/wazuh-docker.git -b v4.14.3Example output:
Working directory untuk melakukan deployment Wazuh manager single-node ada di folder bernama single-node.
cd wazuh-docker/single-nodeExample output:

Generate self-signed certificate untuk SSL, karena komunikasi antar komponen Wazuh dilakukan menggunakan protokol yang secure. Termasuk dashboard yang akan digunakan nantinya diakses menggunakana HTTPS.
docker compose -f generate-indexer-certs.yml run --rm generator
Setelah selesai generate self-signed certificate, bisa langsung docker compose up.
docker compose up -d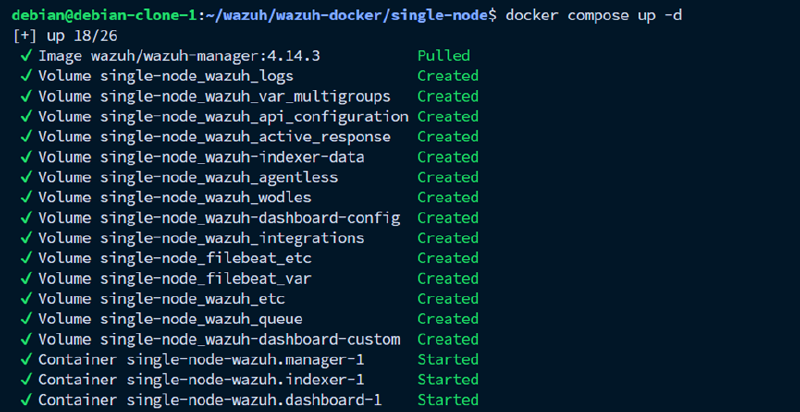
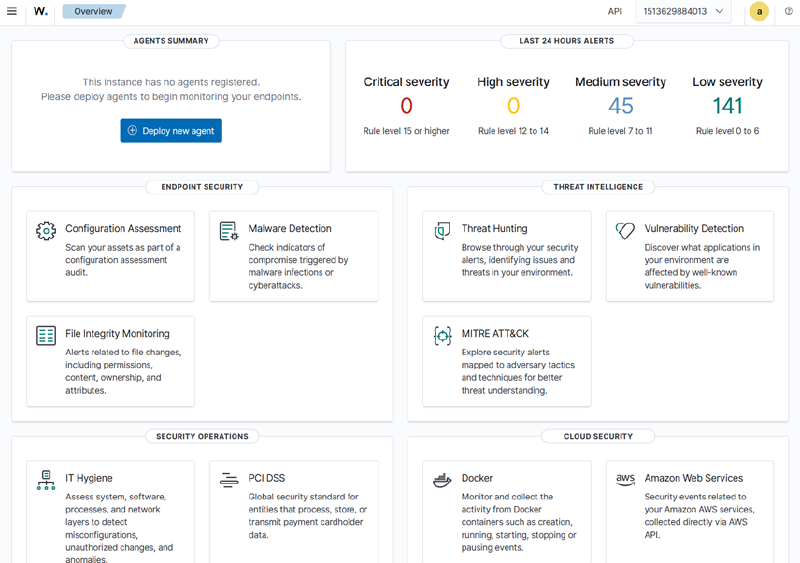
Setelah semua container up and running, butuh waktu 1-3 menit untuk Wazuh indexer selesai diinisiasi dan siap untuk beroperasi. Akses IP server menggunakan protokol https pada port yang telah ditentukan (defaultnya 443). Kredensial default untuk Wazuh dashboard adalah admin:SecretPassword.
Instalasi Wazuh Agent#
Server yang akan dimonitor harus dipasangi Wazuh agent untuk mengumpulkan data-data yang dibutuhkan dan kemudian diforward ke Wazuh manager.
Meskipun Wazuh menyediakan preconfigured Docker compose untuk deployment agent, Wazuh agent akan mendapatkan visibilitas yang baik pada server host jika dideploy as a service. Wazuh agent memiliki beberapa keterbatasan jika dideploy sebagai docker container.
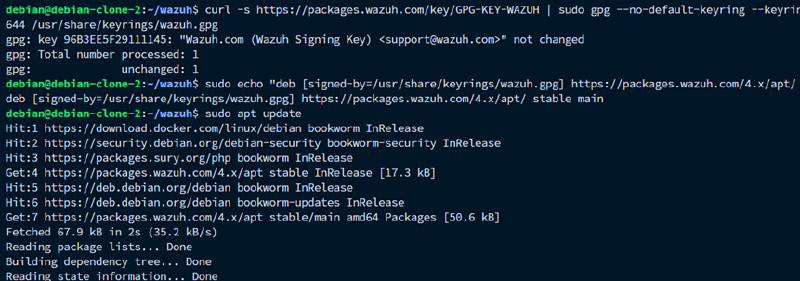
Pertama-tama, daftarkan repositori Wazuh pada package manager host.
sudo apt install gnupg apt-transport-https
curl -s https://packages.wazuh.com/key/GPG-KEY-WAZUH | sudo gpg --no-default-keyring --keyring gnupg-ring:/usr/share/keyrings/wazuh.gpg --import && sudo chmod 644 /usr/share/keyrings/wazuh.gpg
echo "deb [signed-by=/usr/share/keyrings/wazuh.gpg] https://packages.wazuh.com/4.x/apt/ stable main" | sudo tee -a /etc/apt/sources.list.d/wazuh.lis
Example output:
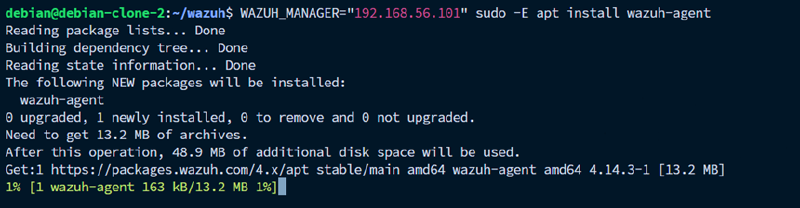
Instal package wazuh-agent ditambah dengan membuat environment variable WAZUH_MANAGER yang berisi IP address dari Wazuh manager.
WAZUH_MANAGER="x.x.x.x" sudo -E apt install wazuh-agentExample output:
Sebelum mengaktifkan service Wazuh agent, sesuaikan konfigurasinya terlebih dahulu. File konfigurasi Wazuh agent secara default terdapat di /var/ossec/etc/ossec.conf.
sudo nano /var/ossec/etc/ossec.confContoh konfigurasi dapat dilihat pada bagian Contoh Konfigurasi Default Wazuh Agent untuk Ubuntu 22.04 di bawah.
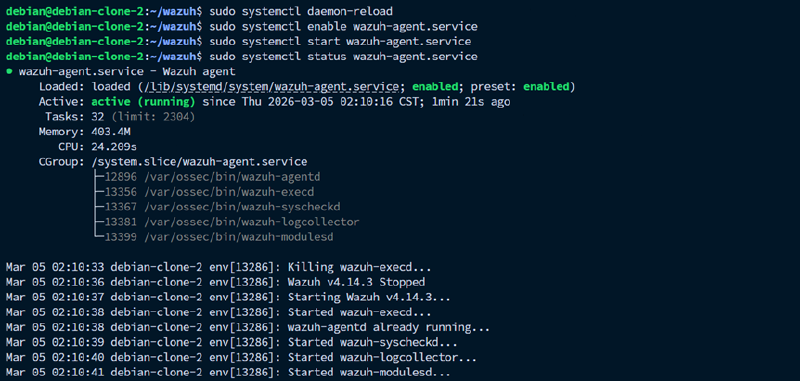
Aktifkan dan jalankan service wazuh agent untuk mulai menginisiasi komunikasi dengan Wazuh manager.
sudo systemctl daemon-reload
sudo systemctl enable wazuh-agent
sudo systemctl start wazuh-agent
Example output:
Contoh Konfigurasi Default Wazuh Agent untuk Ubuntu 22.04#
Berikut adalah contoh konfigurasi ossec.conf di server Ubuntu 22.04 (sesuaikan MANAGER_IP terlebih dahulu):
<!--
  Wazuh - Agent - General Configuration for Ubuntu 22.04 LTS (Jammy Jellyfish)
-->

<ossec_config>

  <client>
    <server>
      <address>MANAGER_IP</address>
      <port>1514</port>
      <protocol>tcp</protocol>
    </server>
    <config-profile>ubuntu, ubuntu22, ubuntu2204</config-profile>
    <notify_time>20</notify_time>
    <time-reconnect>60</time-reconnect>
    <auto_restart>yes</auto_restart>
    <crypto_method>aes</crypto_method>
  </client>

  <client_buffer>
    <disabled>no</disabled>
    <queue_size>5000</queue_size>
    <events_per_second>500</events_per_second>
  </client_buffer>

  <rootcheck>
    <disabled>no</disabled>
    <check_files>yes</check_files>
    <check_trojans>yes</check_trojans>
    <check_dev>yes</check_dev>
    <check_sys>yes</check_sys>
    <check_pids>yes</check_pids>
    <check_ports>yes</check_ports>
    <check_if>yes</check_if>

    <frequency>43200</frequency>

    <rootkit_files>etc/shared/rootkit_files.txt</rootkit_files>
    <rootkit_trojans>etc/shared/rootkit_trojans.txt</rootkit_trojans>

    <skip_nfs>yes</skip_nfs>
  </rootcheck>

  <wodle name="cis-cat">
    <disabled>yes</disabled>
    <timeout>1800</timeout>
    <interval>1d</interval>
    <scan-on-start>yes</scan-on-start>
    <java_path>wodles/java</java_path>
    <ciscat_path>wodles/ciscat</ciscat_path>
  </wodle>

  <wodle name="osquery">
    <disabled>yes</disabled>
    <run_daemon>yes</run_daemon>
    <log_path>/var/log/osquery/osqueryd.results.log</log_path>
    <config_path>/etc/osquery/osquery.conf</config_path>
    <add_labels>yes</add_labels>
  </wodle>

  <wodle name="syscollector">
    <disabled>no</disabled>
    <interval>1h</interval>
    <scan_on_start>yes</scan_on_start>
    <hardware>yes</hardware>
    <os>yes</os>
    <network>yes</network>
    <packages>yes</packages>
    <ports all="yes">yes</ports>
    <processes>yes</processes>
    <users>yes</users>
    <groups>yes</groups>
    <services>yes</services>

    <synchronization>
      <max_eps>10</max_eps>
    </synchronization>
  </wodle>

  <sca>
    <enabled>yes</enabled>
    <scan_on_start>yes</scan_on_start>
    <interval>12h</interval>
    <skip_nfs>yes</skip_nfs>
  </sca>

  <syscheck>
    <disabled>no</disabled>
    <frequency>43200</frequency>
    <scan_on_start>yes</scan_on_start>

    <!-- Direktori sistem dasar — relevan untuk semua Ubuntu 22.04 -->
    <directories realtime="yes">/etc,/usr/bin,/usr/sbin</directories>
    <directories realtime="yes">/bin,/sbin,/boot</directories>
    <directories realtime="yes">/root</directories>
    <directories realtime="yes">/var/spool/cron</directories>

    <ignore>/etc/mtab</ignore>
    <ignore>/etc/hosts.deny</ignore>
    <ignore>/etc/mail/statistics</ignore>
    <ignore>/etc/random-seed</ignore>
    <ignore>/etc/random.seed</ignore>
    <ignore>/etc/adjtime</ignore>
    <ignore>/etc/httpd/logs</ignore>
    <ignore>/etc/utmpx</ignore>
    <ignore>/etc/wtmpx</ignore>
    <ignore>/etc/cups/certs</ignore>
    <ignore>/etc/dumpdates</ignore>
    <ignore>/etc/svc/volatile</ignore>
    <ignore>/etc/apparmor.d/cache.d</ignore>

    <ignore type="sregex">.log$|.swp$</ignore>

    <nodiff>/etc/ssl/private.key</nodiff>

    <skip_nfs>yes</skip_nfs>
    <skip_dev>yes</skip_dev>
    <skip_proc>yes</skip_proc>
    <skip_sys>yes</skip_sys>

    <process_priority>10</process_priority>
    <max_eps>50</max_eps>

    <synchronization>
      <enabled>yes</enabled>
      <interval>5m</interval>
      <max_eps>10</max_eps>
    </synchronization>
  </syscheck>

  <active-response>
    <disabled>no</disabled>
    <ca_store>etc/wpk_root.pem</ca_store>
    <ca_verification>yes</ca_verification>
  </active-response>

  <logging>
    <log_format>plain</log_format>
  </logging>

</ossec_config>

<ossec_config>

  <localfile>
    <log_format>journald</log_format>
    <location>journald</location>
  </localfile>

  <localfile>
    <log_format>syslog</log_format>
    <location>/var/log/syslog</location>
  </localfile>

  <localfile>
    <log_format>syslog</log_format>
    <location>/var/log/auth.log</location>
  </localfile>

  <localfile>
    <log_format>syslog</log_format>
    <location>/var/ossec/logs/active-responses.log</location>
  </localfile>

  <localfile>
    <log_format>syslog</log_format>
    <location>/var/log/dpkg.log</location>
  </localfile>

</ossec_config>
Konfigurasi ini sudah mencakup hal-hal berikut:
- Koneksi ke Wazuh manager, termasuk IP address, port, enkripsi yang dipakai, dan konfigurasi buffering koneksi.
- Threat detecting configuration, yaitu rootcheck untuk mendeteksi rootkit, trojan, file mencurigakan, port tersembunyi, dan perubahan di /dev dan /sys.
- Security Configuration Assessment (SCA) untuk mengecek apakah konfigurasi sistem sesuai best practices CIS benchmark.
- File Integrity Monitoring (FIM) untuk memantau perubahan file secara real-time pada folder-folder penting, yaitu /etc, /usr/bin, /usr/sbin, /bin, /sbin, /boot, /root, dan /var/spool/cron. File yang sering berubah seperti /etc/mtab, /etc/adjtime, file .log dan .swp diignore saja supaya lognya tidak overflow.
- Log monitoring dari journald, /var/log/syslog, /var/log/auth.log, /var/log/dpkg.log, dan active-response.log.
- Syscollector untuk inventarisasi hardware, OS, packet, port, proses, dan user yang ada pada server.
Panduan Konfigurasi Wazuh Agent#
Konfigurasi sebelumnya masih dapat diextend untuk disesuaikan di setiap environment. Berikut hal-hal yang dapat ditambahkan pada konfigurasi Wazuh agent:
- Monitoring Log File
Gunakan elemen
<localfile>
	<log_format>FORMAT</log_format>
	<location>/path/ke/file.log</location>
</localfile>
FORMAT bisa berupa syslog, json, apache, audit, multi-line, journald, command, dan full-command.
- Scheduled Command Execution
Gunakan
<localfile>
	<log_format>full_command</log_format>
	<command>COMMAND</command>
	<frequency>SECONDS</frequency>
</localfile>- File Integrity Monitoring
Tambahkan elemen
<syscheck>
	<directories realtime="yes">/path/ke/direktori</directories>
</syscheck>- Ignore Element
Tambahkan elemen
<syscheck>
	<ignore>/path/ke/file/direktori</ignore>
	<ignore type="sregex">REGEX</ignore>
</syscheck>

<rootcheck>
  <ignore>/path/ke/file/direktori</ignore>
  	<ignore type="sregex">REGEX</ignore>
</rootcheck>- Wodle
Wodle adalah modul opsional Wazuh agent. Aktifkan dengan mengubah
<wodle name="docker-listener">
  <disabled>no</disabled>
</wodle>

<wodle name="osquery">
  <disabled>no</disabled>
  <run_daemon>yes</run_daemon>
  <log_path>/var/log/osquery/osqueryd.results.log</log_path>
  <config_path>/etc/osquery/osquery.conf</config_path>
  <add_labels>yes</add_labels>
</wodle>

<wodle name="cis-cat">
  <disabled>no</disabled>
  <timeout>1800</timeout>
  <interval>1d</interval>
  <scan-on-start>yes</scan-on-start>
  <java_path>wodles/java</java_path>
  <ciscat_path>wodles/ciscat</ciscat_path>
</wodle>- Malware Detection
Tambahkan element
<rootcheck>
  <disabled>no</disabled>
  <check_unixaudit>yes</check_unixaudit>
  <check_files>yes</check_files>
  <check_trojans>yes</check_trojans>
  <check_dev>yes</check_dev>
  <check_sys>yes</check_sys>
  <check_pids>yes</check_pids>
  <check_ports>yes</check_ports>
  <check_if>yes</check_if>
  <ignore type="sregex">^/etc/</ignore>

  <frequency>43200</frequency>

  <rootkit_files>etc/shared/rootkit_files.txt</rootkit_files>
  <rootkit_trojans>etc/shared/rootkit_trojans.txt</rootkit_trojans>

  <skip_nfs>yes</skip_nfs>
</rootcheck>- Security Configuration Assessment
Gunakan element
  <sca>
    <enabled>yes</enabled>
    <scan_on_start>yes</scan_on_start>
    <interval>12h</interval>
    <skip_nfs>yes</skip_nfs>
  </sca>
Konfigurasi FIM + Who-Data#
Modul File Integrity Monitoring pada defaultnya tidak mencatat informasi tentang siapa yang melakukan modifikasi pada file yang dimonitor. Konfigurasi who-data membantu mencatat informasi user, program, dan proses yang terlibat dalam modifikasi suatu file.
Salah satu implementasi who-data adalah menggunakan audit mode, yaitu ekstensi FIM untuk Realtime Monitoring dengan Linux Audit subsystem. Konfigurasi ini dilakukan pada tiap wazuh agent.
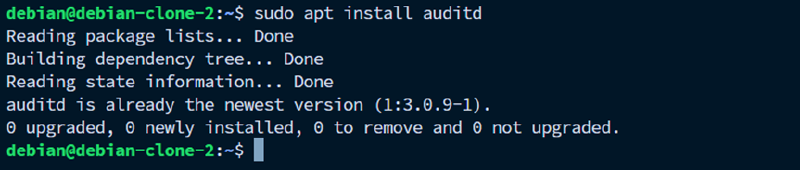
Pertama, pasang package auditd terlebih dahulu.
sudo apt install auditdExample output:
Pasang juga package plugin audispd af_unix melalui package audispd-plugins dan restart service auditd.
sudo apt install audispd-pluginExample output:
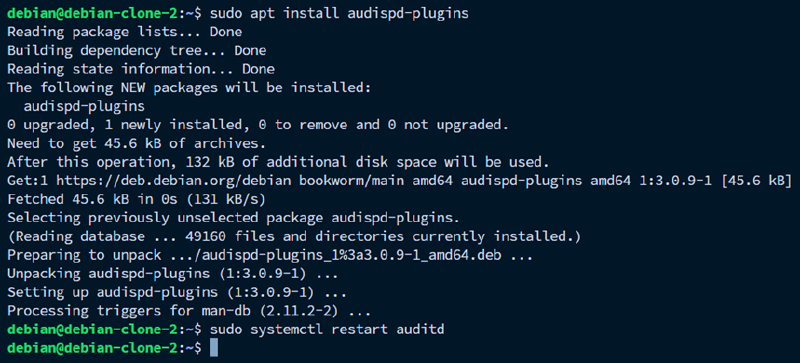
Pada /var/ossec/etc/ossec.conf milik agent, tambahkan element provider dengan value audit di dalam element whodata. Bagian ini diletakkan di dalam element syscheck.
sudo nano /var/ossec/etc/ossec.conf <syscheck>
...
<whodata>
<provider>audit</provider>
</whodata>
</syscheck>Untuk setiap direktori yang akan dimonitor, tambahkan konfigurasi realtime=yes dan whodata=yes pada element directori
<directories realtime="yes" whodata="yes">/path/ke/direktori</directories>Restart service wazuh agent untuk apply perubahan.
sudo systemctl restart wazuh-agentExample output:

Gunakan auditctl untuk memverifikasi rules dari konfigurasi wazuh agent sudah masuk ke auditd. Apabila sudah sesuai, maka akan ditampilkan output “-w -p wa -k wazuh_fim” untuk setiap direktori yang dimonitor.
sudo auditctl -l | grep wazuh_fimExample output:

Konfigurasi Email Alerting untuk FIM#
Server yang disediakan oleh cloud provider biasanya tidak memperbolehkan traffic SMTP outbound. Alternatif yang dapat digunakan untuk mengirim email adalah external API integration. Wazuh mendukung beberapa external API secara native, seperti Slack, Virustotal, dll. Wazuh juga mendukung custom external API integration menggunakan script python.
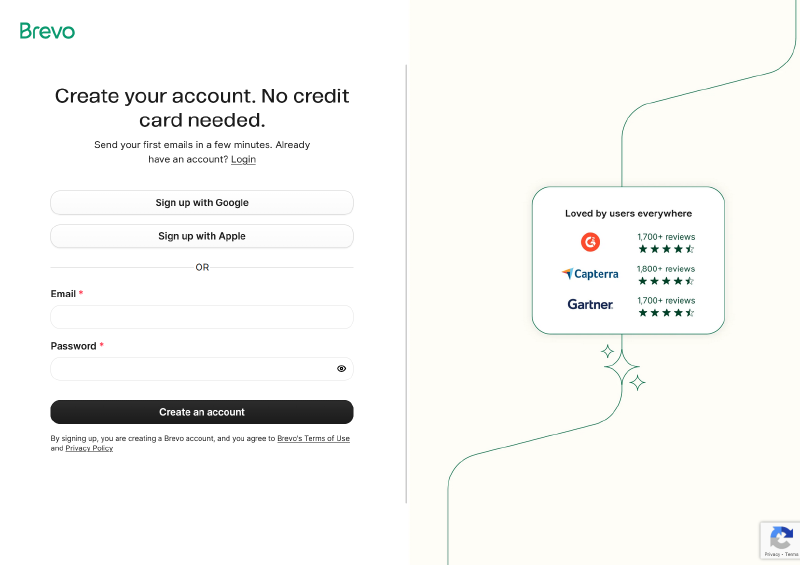
Dokumentasi ini menggunakan Brevo sebagai Email Service Providernya karena mudah digunakan dan free limitnya banyak (300 email/hari). Pertama, buat akun di https://onboarding.brevo.com/account/register. Selesaikan proses pengisian data diri dan pilih free tier.
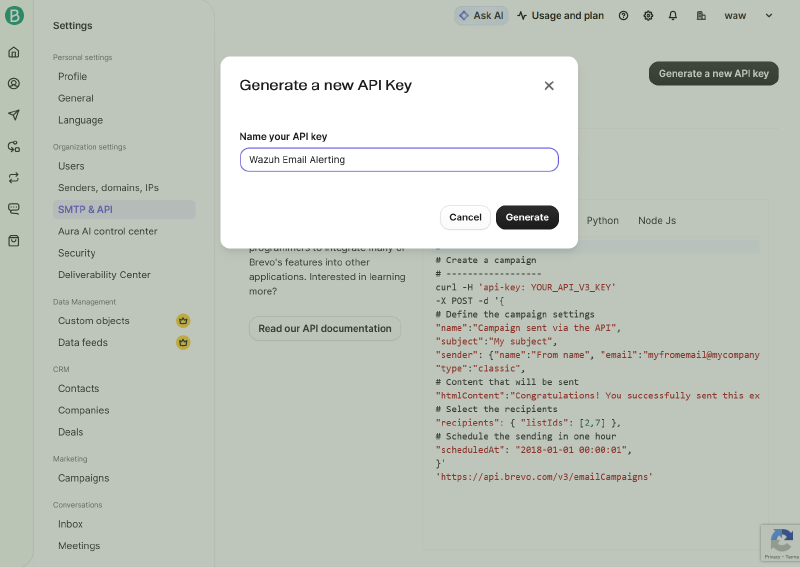
Kemudian, pada Settings > SMTP & API > API keys & MCP, pilih Generate a new API key. Kemudian generate dan simpan API key-nya untuk digunakana nanti.
Selanjutnya, buat file dengan nama custom-brevo yang berisi script untuk memparsing dan mengirim email ke API Brevo. Script untuk custom external API integration harus dimulai dengan prefic custom-. Letakkan scriptnya di folder wazuh-docker/single-node/config/wazuh_cluster/integrations/
cd wazuh-docker/single-node
sudo nano config/wazuh_cluster/integrations/custom-brevo
Berikut adalah contoh script custom-brevo. Jangan lupa untuk menyesuaikan EMAIL_BREVO, EMAIL_TUJUAN, dan NAMA_PENERIMA.
#!/usr/bin/env python3
import json
import sys
import time
from urllib.request import Request, urlopen
from urllib.error import HTTPError, URLError
SENDER_EMAIL = "EMAIL_BREVO"
SENDER_NAME = "Wazuh Alert"
RECIPIENT_LIST = [
{"email": "EMAIL_TUJUAN1", "name": "NAMA_PENERIMA"},
{"email": "EMAIL_TUJUAN2", "name": "NAMA_PENERIMA"},
]
SUBJECT_PREFIX = "[Wazuh]"
LOG_FILE = "/var/ossec/logs/integrations.log"
def log(msg):
timestamp = time.strftime("%Y-%m-%d %H:%M:%S", time.localtime())
entry = "{} custom-brevo: {}\n".format(timestamp, msg)
try:
with open(LOG_FILE, "a") as f:
f.write(entry)
except Exception:
pass
def read_alert(alert_file_path):
try:
with open(alert_file_path) as f:
alert = json.load(f)
return alert
except Exception as e:
log("ERROR: Gagal membaca alert file {}: {}".format(alert_file_path, e))
sys.exit(1)
def build_subject(alert):
rule = alert.get("rule", {})
rule_level = rule.get("level", 0)
description = rule.get("description", "Wazuh Alert")
if rule_level >= 12:
severity = "CRITICAL"
elif rule_level >= 8:
severity = "HIGH"
elif rule_level >= 5:
severity = "MEDIUM"
else:
severity = "LOW"
return "{} [{}] {}".format(SUBJECT_PREFIX, severity, description)
def build_html(alert):
rule = alert.get("rule", {})
agent = alert.get("agent", {})
syscheck = alert.get("syscheck", {})
audit = syscheck.get("audit", {})
timestamp = alert.get("timestamp", "-")
rule_level = rule.get("level", 0)
rule_desc = rule.get("description", "-")
agent_name = agent.get("name", "-")
agent_ip = agent.get("ip", "-")
file_path = syscheck.get("path", "")
file_event = syscheck.get("event", "")
changed_attrs = syscheck.get("changed_attributes", [])
size_before = syscheck.get("size_before", "")
size_after = syscheck.get("size_after", "")
diff = syscheck.get("diff", "")
login_user = audit.get("login_user", {}).get("name", "")
effective_user = audit.get("effective_user", {}).get("name", "")
process_name = audit.get("process", {}).get("name", "")
process_cwd = audit.get("process", {}).get("cwd", "")
if rule_level >= 12:
color = "#c0392b"
elif rule_level >= 8:
color = "#d35400"
elif rule_level >= 5:
color = "#e67e22"
else:
color = "#2980b9"
ROW = '<tr{bg}><td style="padding:6px 12px;font-weight:bold;width:130px;color:#555;">{label}</td><td style="padding:6px 12px;">{value}</td></tr>'
ZEBRA = ' style="background:#f9f9f9;"'
SEPARATOR = '<tr><td colspan="2" style="border-top:1px solid #eee;padding:0;"></td></tr>'
rows = []
if file_path:
rows.append(ROW.format(bg="", label="File", value="<code>{}</code>".format(file_path)))
rows.append(ROW.format(bg=ZEBRA, label="Event", value=file_event))
if changed_attrs:
display_attrs = [a for a in changed_attrs if a not in ("md5", "sha1", "sha256")]
if display_attrs:
rows.append(ROW.format(bg="", label="Changed", value=", ".join(display_attrs)))
if size_before and size_after:
rows.append(ROW.format(bg=ZEBRA, label="Size", value="{} → {} bytes".format(size_before, size_after)))
if diff:
rows.append('<tr><td style="padding:6px 12px;font-weight:bold;color:#555;">Diff</td><td style="padding:6px 12px;"><pre style="background:#2d2d2d;color:#f8f8f2;padding:8px;border-radius:4px;font-size:12px;overflow-x:auto;">{}</pre></td></tr>'.format(diff))
if login_user or process_name:
rows.append(SEPARATOR)
if login_user:
user_display = login_user
if effective_user and effective_user != login_user:
user_display = "{} → {} (sudo)".format(login_user, effective_user)
rows.append(ROW.format(bg="", label="User", value="<strong>{}</strong>".format(user_display)))
elif effective_user:
rows.append(ROW.format(bg="", label="User", value=effective_user))
if process_name:
rows.append(ROW.format(bg=ZEBRA, label="Process", value="<code>{}</code>".format(process_name)))
if process_cwd:
rows.append(ROW.format(bg="", label="Working Dir", value="<code>{}</code>".format(process_cwd)))
rows.append(SEPARATOR)
rows.append(ROW.format(bg="", label="Agent", value="{} ({})".format(agent_name, agent_ip)))
rows.append(ROW.format(bg=ZEBRA, label="Time", value=timestamp))
table_rows = "\n ".join(rows)
html = """
<!DOCTYPE html>
<html>
<head><meta charset="utf-8"></head>
<body style="font-family:Arial,Helvetica,sans-serif;margin:0;padding:0;background:#f4f4f4;">
<div style="max-width:600px;margin:20px auto;background:#fff;border-radius:8px;overflow:hidden;box-shadow:0 2px 8px rgba(0,0,0,0.1);">
<div style="background:{color};color:#fff;padding:14px 20px;">
<p style="margin:0;font-size:16px;font-weight:bold;">{desc}</p>
</div>
<table style="width:100%;border-collapse:collapse;font-size:14px;">
{table_rows}
</table>
<div style="background:#ecf0f1;padding:8px 20px;font-size:11px;color:#95a5a6;text-align:center;">
Wazuh FIM Alert
</div>
</div>
</body>
</html>
""".format(
color=color,
desc=rule_desc,
table_rows=table_rows,
)
return html
def send_email(api_key, hook_url, subject, html_content):
payload = {
"sender": {
"name": SENDER_NAME,
"email": SENDER_EMAIL,
},
"to": RECIPIENT_LIST,
"subject": subject,
"htmlContent": html_content,
}
data = json.dumps(payload).encode("utf-8")
req = Request(hook_url, data=data)
req.add_header("accept", "application/json")
req.add_header("content-type", "application/json")
req.add_header("api-key", api_key)
try:
response = urlopen(req)
response_body = response.read().decode("utf-8")
log("OK: Email terkirim. Response: {}".format(response_body))
except HTTPError as e:
error_body = e.read().decode("utf-8") if hasattr(e, "read") else str(e)
log("ERROR: HTTP {} - {}".format(e.code, error_body))
sys.exit(1)
except URLError as e:
log("ERROR: Koneksi gagal - {}".format(e.reason))
sys.exit(1)
except Exception as e:
log("ERROR: UnExample - {}".format(e))
sys.exit(1)
def main():
if len(sys.argv) < 4:
log("ERROR: Argumen tidak lengkap. Usage: custom-brevo <alert_file> <api_key> <hook_url>")
sys.exit(1)
alert_file_path = sys.argv[1]
api_key = sys.argv[2]
hook_url = sys.argv[3]
alert = read_alert(alert_file_path)
subject = build_subject(alert)
html = build_html(alert)
log("Mengirim email untuk rule {} (level {})...".format(
alert.get("rule", {}).get("id", "?"),
alert.get("rule", {}).get("level", "?"),
))
send_email(api_key, hook_url, subject, html)
if __name__ == "__main__":
main()Script di atas betrujuan untuk membaca file JSON alert dari rule yang tertrigger, kemudian membuat subject email berdasarkan severity (LOW/MEDIUM/HIGH/CRITICAL). Isi dari emailnya berupa HTML yang berisi detail perubahan file, yaitu path, event, diff, user, process, info agent. Email akan dikirim ke daftar penerima yang tertera.
Selanjutnya, melalui menu Server Management > Rules di Wazuh dashboard, tulis rules baru untuk menyaring event yang dibutuhkan untuk mentrigger email alerting.
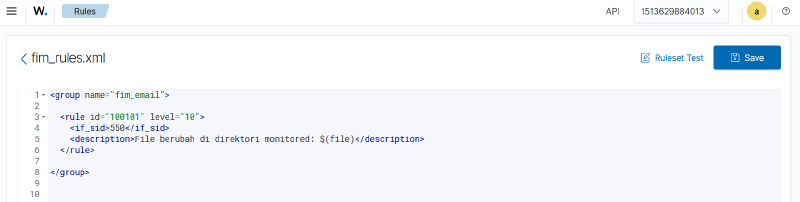
Berikut adalah contoh rules untuk menyaring event modifikasi pada file:
<group name="fim_email">

  <rule id="100101" level="10">
    <if_sid>550,553,554</if_sid>
    <description>File berubah di direktori monitored: $(file)</description>
  </rule>

</group>
Rule di atas akan terpicu kalau salah satu dari rule bawaan Wazuh, yaitu 550 (file berubah), 553 (file dihapus), atau 554 (file ditambahkan) tertrigger. Implementasi custom rule bisa jadi sangat luas. berikut:
- Detecting git pull
  <rule id="100104" level="10">
    <if_sid>550,553,554</if_sid>
    <field name="file" type="pcre2">\.git/FETCH_HEAD$</field>
    <description>GIT Pull terdeteksi: $(file)</description>
</rule>- Detecting git clone
  <rule id="100107" level="10">
    <if_sid>554</if_sid>
    <field name="file" type="pcre2">\.git/refs/remotes/[^/]+/HEAD$</field>
    <description>GIT Clone terdeteksi: $(file)</description>
</rule>- Detecting malicious file
	<rule id="100108" level="12">
	  <if_sid>554</if_sid>
	  <field name="file" type="pcre2">\.(sh|exe)(\.\w+)?$</field>
	  <description>File mencurigakan terdeteksi: $(file)</description>
	</rule>
Kemudian, tambahkan element
nano config/wazuh_cluster/wazuh_manager.conf<ossec_config>
<integration>
<name>custom-brevo</name>
<hook_url>https://api.brevo.com/v3/smtp/email</hook_url>
<api_key>YOUR_BREVO_API_KEY</api_key>
<group>fim_email</group>
<alert_format>json</alert_format>
</integration>
...
</ossec_config>Example output:

Mount file yang baru saja dibuat ke dalam volume Wazuh manager.
nano docker-compose.ymlservices:
wazuh.manager:
...
volumes:
...
- ./config/wazuh_cluster/wazuh_manager.conf:/wazuh-config-mount/etc/ossec.conf
- ./config/wazuh_cluster/integrations/custom-brevo:/var/ossec/integrations/custom-
brevoExample output:

Jangan lupa recreate Wazuh manager dengan cara docker compose down dan up ulang untuk mengapply konfigurasinya.
docker compose down && docker compose up -dDi dalam wazuh manager, sesuaikan permission dan kepemilikan dari file-file yang baru saja ditambahkan.
docker exec single-node-wazuh.manager-1 chmod 750 /var/ossec/integrations/custom-brevo
docker exec single-node-wazuh.manager-1 chown root:wazuh /var/ossec/integrations/custom-brevo
Berikut adalah contoh dari email yang berhasil terkirim:

Konfigurasi MySQL Monitoring + Email Alerting#
MySQL Community Edition pada defaultnya tidak memiliki modul audit bawaan. Logging yang ditawarkan hanya berupa general log yang hanya mencatat setiap query yang dijalankan. Alternatifnya dapat menggunakan plugin audit dari Percona yang compatible dengan MySQL.
Instalasi Percona pada MySQL non-docker#
Pertama, cek dulu versi MySQL yang digunakan.
mysql -u root -p
SELECT VERSION();
exit
Example output:

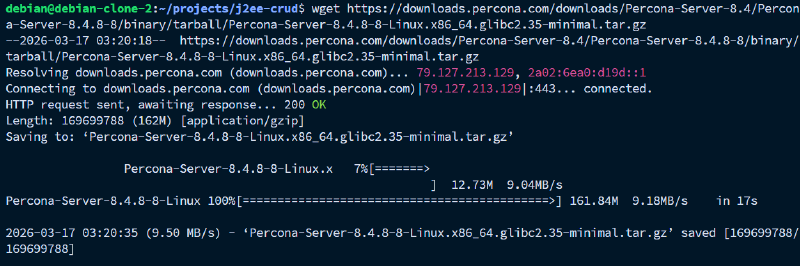
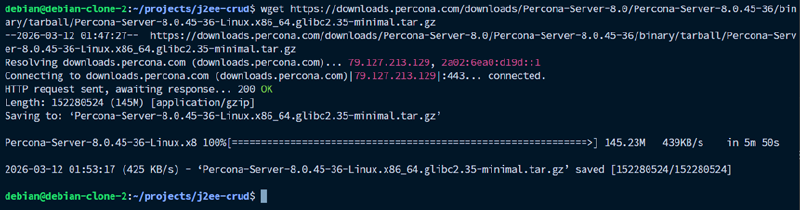
Download percona server sesuai dengan versi MySQL yang digunakan. Sesuaikan X dengan versi yang digunakan.
wget https://downloads.percona.com/downloads/Percona-Server-X.X/Percona-Server-X.X.XX-XX/binary/tarball/Percona-Server-X.X.XX-XX-Linux.x86_64.glibc2.35-minimal.tar.gzExample output:
Ekstrak plugin audit dari archive yang telah didownlaod. Sesuaikan X dengan versi yang digunakan.
tar -xzf Percona-Server-X.X.XX-XX-Linux.x86_64.glibc2.35-minimal.tar.gz \
--wildcards '*/lib/plugin/audit_log.so' --strip-components=3
Example output:

Pindahkan file plugin ke dalam direktori plugin mysql.
sudo cp audit_log.so /usr/lib/mysql/plugin/
# atau
sudo cp audit_log.so /usr/lib64/mysql/plugin/
Example output:

Lakukan instalasi plugin tersebut beserta konfigurasinya ke dalam MySQL.
mysql -u root -p
INSTALL PLUGIN audit_log SONAME 'audit_log.so';
exit
Example output:

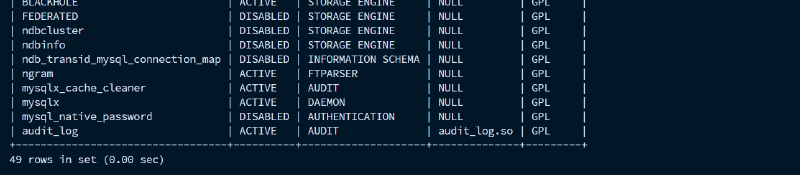
Verifikasi apakah plugin auditnya sudah terpasang ke dalam MySQL.
SHOW PLUGINS;Example output:
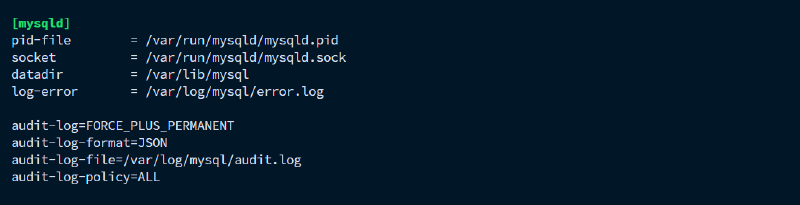
Tambahkan konfigurasi plugin audit pada file konfigurasi /etc/mysql/mysql.conf.d/mysqld.cnf
sudo nano /etc/mysql/mysql.conf.d/mysqld.cnfTambahkan konfigurasi berikut pada line paling bawah.
audit-log=FORCE_PLUS_PERMANENT
audit-log-format=JSON
audit-log-file=/var/log/mysql/audit.log
audit-log-policy=ALL
Example output:
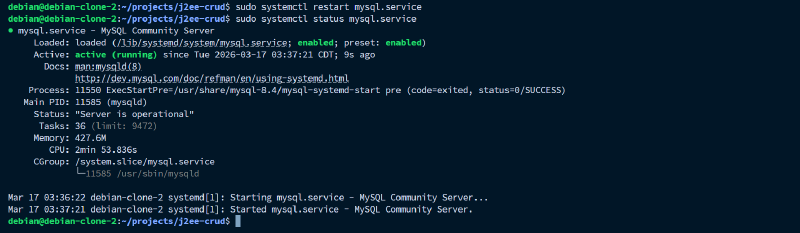
Restart service mysql server
sudo systemctl restart mysql.serviceExample output:
Instalasi Percona pada MySQL docker#
Pertama, cek dulu versi MySQL yang digunakan. Ganti NAMA_CONTAINER dan PASSWORD sesuai dengan konfigurasi container.
docker exec -it NAMA_CONTAINER mysql -u root -p PASSWORD -e "SELECT VERSION();"Expected output:

Download percona server sesuai dengan versi MySQL yang digunakan. Sesuaikan X dengan versi yang digunakan.
wget https://downloads.percona.com/downloads/Percona-Server-X.X/Percona-Server-X.X.XX-XX/binary/tarball/Percona-Server-X.X.XX-XX-Linux.x86_64.glibc2.35-minimal.tar.gzExample output:
Ekstrak plugin audit dari archive yang telah didownlaod. Sesuaikan X dengan versi yang digunakan.
tar -xzf Percona-Server-X.X.XX-XX-Linux.x86_64.glibc2.35-minimal.tar.gz \
--wildcards '*/lib/plugin/audit_log.so' --strip-components=3
Example output:

Berikan plugin tersebut beserta konfigurasinya ke dalam MySQL container. Pada kasus ini menggunakan Docker compose.
nano docker-compose.yml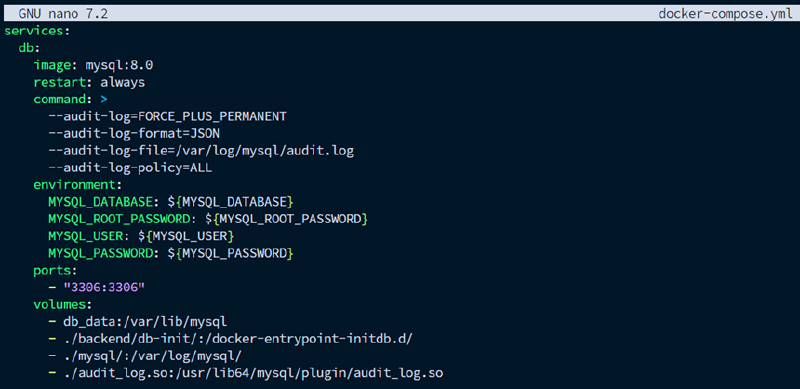
Recreate database menjalankan perintah docker compose up -d ulang.
docker compose up -dExpected output:

Lakukan instalasi terhadap plugin audit di dalam container. Ganti NAMA_CONTAINER dan PASSWORD sesuai dengan konfigurasi container.
docker exec -it NAMA_CONTAINER mysql -u root -p PASSWORD -e "INSTALL PLUGIN audit_log SONAME 'audit_log.so';"
Verifikasi apakah plugin auditnya sudah terpasang ke dalam MySQL.
docker exec -it NAMA_CONTAINER mysql -u root -p PASSWORD -e "SHOW PLUGINS;" | grep auditExpected output:

Konfigurasi MySQL Custom Rules#
Pada menu Server Management > Rules, buat custom rules untuk menginterpretasikan log dari MySQL ke dalam sistem alert. Reload konfigurasi pada pop-up notifikasi yang muncul.
Contoh rules MySQL monitoring:
<group name="mysql">

    <rule id="100172" level="7">
        <decoded_as>json</decoded_as>
        <field name="audit_record.sqltext" type="pcre2">(?i)^drop\s+user</field>
        <description>MySQL DROP USER detected</description>
        <mitre>
            <id>T1078</id>
        </mitre>
    </rule>

    <rule id="100156" level="12">
        <decoded_as>json</decoded_as>
        <field name="audit_record.sqltext" type="pcre2">(?i)^delete\s+from\s+</field>
        <description>MySQL DML DELETE detected</description>
        <mitre>
            <id>T1485</id>
        </mitre>
    </rule>

    <rule id="100180" level="10">
        <decoded_as>json</decoded_as>
        <field name="audit_record.sqltext" type="pcre2">(?i)^load\s+data\s+(local\s+)?infile</field>
        <description>MySQL DML LOAD DATA INFILE detected</description>
        <mitre>
            <id>T1059</id>
        </mitre>
    </rule>

    <rule id="100152" level="12">
        <decoded_as>json</decoded_as>
        <field name="audit_record.sqltext" type="pcre2">(?i)^drop\s+table</field>
        <description>MySQL DROP TABLE detected</description>
        <mitre>
            <id>T1485</id>
        </mitre>
    </rule>

    <rule id="100155" level="12">
        <decoded_as>json</decoded_as>
        <field name="audit_record.sqltext" type="pcre2">(?i)^drop\s+database</field>
        <description>MySQL DROP DATABASE detected</description>
        <mitre>
            <id>T1485</id>
        </mitre>
    </rule>

    <rule id="100174" level="10">
        <decoded_as>json</decoded_as>
        <field name="audit_record.sqltext" type="pcre2">(?i)^truncate(\s+table)?\s+</field>
        <description>MySQL TRUNCATE TABLE detected</description>
        <mitre>
            <id>T1485</id>
        </mitre>
    </rule>

    <rule id="100181" level="12">
        <decoded_as>json</decoded_as>
        <field name="audit_record.sqltext" type="pcre2">(?i)into\s+outfile\s+</field>
        <description>MySQL SELECT INTO OUTFILE detected</description>
        <mitre>
            <id>T1048</id>
        </mitre>
    </rule>

    <rule id="100182" level="14">
        <decoded_as>json</decoded_as>
        <field name="audit_record.sqltext" type="pcre2">(?i)into\s+dumpfile\s+</field>
        <description>MySQL SELECT INTO DUMPFILE detected</description>
        <mitre>
            <id>T1048</id>
        </mitre>
    </rule>

</group>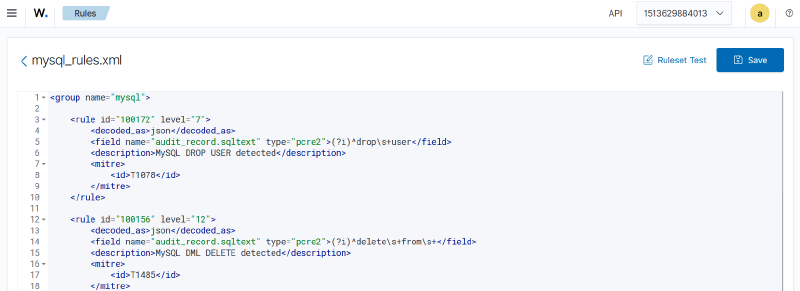
Rules di atas pada dasarnya menyaring json dari plugin audit Percona yang dikirimkan oleh Wazuh agent. Proses penyaringannya menggunakan filter Regex pada element
    <rule id="100199" level="7">
        <decoded_as>json</decoded_as>
        <field name="audit_record.sqltext" type="pcre2">(?i)^revoke\s+</field>
        <description>MySQL REVOKE detected</description>
    </rule>
Selanjutnya, pada server agent, tambahkan konfigurasi di /var/ossec/etc/ossec.conf untuk mengambil log dari database MySQL.
sudo nano /var/ossec/etc/ossec.conf <localfile>
<log_format>syslog</log_format>
<location>/path/to/audit.log</location>
</localfile>
Restart service wazuh agent.
sudo systemctl restart wazuh-agentExample output:

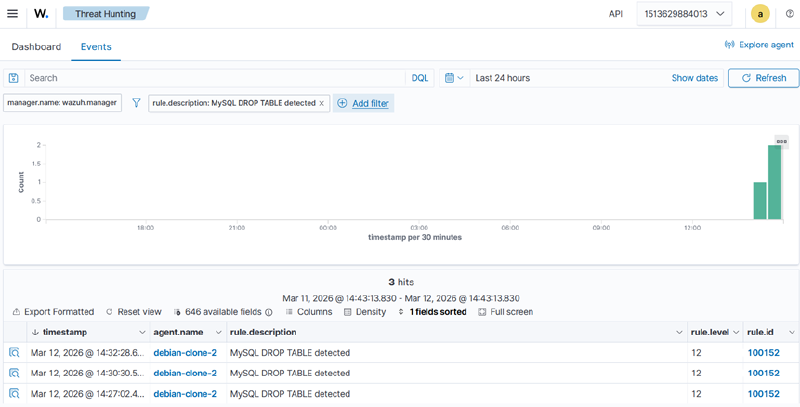
Pengujian membuat dan menghapus tabel baru di database untuk memastikan decoder dan rulesnya berjalan dengan lancar.
CREATE TABLE testing (id INT);
DROP TABLE testing;
Example output:
Konfigurasi Email Alerting untuk MySQL Event#
Terlihat di atas bahwa eventnya sudah masuk ke dalam alert. Selanjutnya adalah konfigurasi email alerting yang dihubungkan.
Buat custom python script baru bernama custom-brevo-mysql untuk memparsing dan mengirim email ke API Brevo. Script untuk custom external API integration harus dimulai dengan prefic custom-. Letakkan scriptnya di folder wazuh-docker/single-node/config/wazuh_cluster/integrations/
cd wazuh-docker/single-node
nano config/wazuh_cluster/integrations/custom-brevo-mysql
Berikut contoh custom scriptnya. Sesuaikan EMAIL_BREVO, EMAIL_TUJUAN, dan NAMA_PENERIMA.
#!/usr/bin/env python3
import json
import sys
import time

from urllib.request import Request, urlopen
from urllib.error import HTTPError, URLError

SENDER_EMAIL = "EMAIL_BREVO"
SENDER_NAME = "Wazuh Alert"

RECIPIENT_LIST = [
    {"email": "EMAIL_TUJUAN1", "name": "NAMA_PENERIMA"},
    {"email": "EMAIL_TUJUAN2", "name": "NAMA_PENERIMA"},
]

SUBJECT_PREFIX = "[Wazuh]"

LOG_FILE = "/var/ossec/logs/integrations.log"

def log(msg):
    timestamp = time.strftime("%Y-%m-%d %H:%M:%S", time.localtime())
    entry = "{} custom-brevo-mysql: {}\n".format(timestamp, msg)
    try:
        with open(LOG_FILE, "a") as f:
            f.write(entry)
    except Exception:
        pass

def read_alert(alert_file_path):
    try:
        with open(alert_file_path) as f:
            alert = json.load(f)
        return alert
    except Exception as e:
        log("ERROR: Gagal membaca alert file {}: {}".format(alert_file_path, e))
        sys.exit(1)

def build_subject(alert):
    rule = alert.get("rule", {})
    rule_level = rule.get("level", 0)
    description = rule.get("description", "Wazuh Alert")

    if rule_level >= 12:
        severity = "CRITICAL"
    elif rule_level >= 8:
        severity = "HIGH"
    elif rule_level >= 5:
        severity = "MEDIUM"
    else:
        severity = "LOW"

    return "{} [{}] {}".format(SUBJECT_PREFIX, severity, description)

def build_html(alert):
    rule = alert.get("rule", {})
    agent = alert.get("agent", {})
    data = alert.get("data", {})
    audit = data.get("audit_record", {})

    timestamp = alert.get("timestamp", "-")
    rule_level = rule.get("level", 0)
    rule_desc = rule.get("description", "-")

    agent_name = agent.get("name", "-")
    agent_ip = agent.get("ip", "-")

    sqltext = audit.get("sqltext", "-")
    mysql_user = audit.get("user", "-")
    mysql_host = audit.get("host", "-")
    mysql_ip = audit.get("ip", "-")
    mysql_db = audit.get("db", "-")

    if rule_level >= 12:
        color = "#c0392b"
    elif rule_level >= 8:
        color = "#d35400"
    elif rule_level >= 5:
        color = "#e67e22"
    else:
        color = "#2980b9"

    ROW = '<tr{bg}><td style="padding:6px 12px;font-weight:bold;width:130px;color:#555;">{label}</td><td style="padding:6px 12px;">{value}</td></tr>'
    ZEBRA = ' style="background:#f9f9f9;"'
    SEPARATOR = '<tr><td colspan="2" style="border-top:1px solid #eee;padding:0;"></td></tr>'

    rows = []

    rows.append(ROW.format(bg="", label="Query", value="<code>{}</code>".format(sqltext)))

    rows.append(SEPARATOR)
    rows.append(ROW.format(bg="", label="MySQL User", value=mysql_user))
    rows.append(ROW.format(bg=ZEBRA, label="Host", value=mysql_host))
    rows.append(ROW.format(bg="", label="IP", value=mysql_ip if mysql_ip else "-"))
    rows.append(ROW.format(bg=ZEBRA, label="Database", value=mysql_db))

    rows.append(SEPARATOR)
    rows.append(ROW.format(bg="", label="Agent", value="{} ({})".format(agent_name, agent_ip)))
    rows.append(ROW.format(bg=ZEBRA, label="Time", value=timestamp))

    table_rows = "\n      ".join(rows)

    html = """
<!DOCTYPE html>
<html>
<head><meta charset="utf-8"></head>
<body style="font-family:Arial,Helvetica,sans-serif;margin:0;padding:0;background:#f4f4f4;">
  <div style="max-width:600px;margin:20px auto;background:#fff;border-radius:8px;overflow:hidden;box-shadow:0 2px 8px rgba(0,0,0,0.1);">

    <div style="background:{color};color:#fff;padding:14px 20px;">
      <p style="margin:0;font-size:16px;font-weight:bold;">{desc}</p>
    </div>

    <table style="width:100%;border-collapse:collapse;font-size:14px;">
      {table_rows}
    </table>

    <div style="background:#ecf0f1;padding:8px 20px;font-size:11px;color:#95a5a6;text-align:center;">
      Wazuh MySQL Alert
    </div>
  </div>
</body>
</html>
""".format(
        color=color,
        desc=rule_desc,
        table_rows=table_rows,
    )

    return html

def send_email(api_key, hook_url, subject, html_content):
    payload = {
        "sender": {
            "name": SENDER_NAME,
            "email": SENDER_EMAIL,
        },
        "to": RECIPIENT_LIST,
        "subject": subject,
        "htmlContent": html_content,
    }

    data = json.dumps(payload).encode("utf-8")

    req = Request(hook_url, data=data)
    req.add_header("accept", "application/json")
    req.add_header("content-type", "application/json")
    req.add_header("api-key", api_key)

    try:
        response = urlopen(req)
        response_body = response.read().decode("utf-8")
        log("OK: Email terkirim. Response: {}".format(response_body))
    except HTTPError as e:
        error_body = e.read().decode("utf-8") if hasattr(e, "read") else str(e)
        log("ERROR: HTTP {} - {}".format(e.code, error_body))
        sys.exit(1)
    except URLError as e:
        log("ERROR: Koneksi gagal - {}".format(e.reason))
        sys.exit(1)
    except Exception as e:
        log("ERROR: UnExample - {}".format(e))
        sys.exit(1)

def main():
    if len(sys.argv) < 4:
        log("ERROR: Argumen tidak lengkap. Usage: custom-brevo-mysql <alert_file> <api_key> <hook_url>")
        sys.exit(1)

    alert_file_path = sys.argv[1]
    api_key = sys.argv[2]
    hook_url = sys.argv[3]

    alert = read_alert(alert_file_path)

    subject = build_subject(alert)
    html = build_html(alert)

    log("Mengirim email untuk rule {} (level {})...".format(
        alert.get("rule", {}).get("id", "?"),
        alert.get("rule", {}).get("level", "?"),
    ))
    send_email(api_key, hook_url, subject, html)

if __name__ == "__main__":
    main()
Script di atas betrujuan untuk membaca file JSON alert dari rule yang tertrigger, kemudian membuat subject email berdasarkan severity (LOW/MEDIUM/HIGH/CRITICAL). Isi dari emailnya berupa HTML yang berisi detail perubahan file, yaitu path, event, diff, user, process, info agent. Email akan dikirim ke daftar penerima yang tertera.
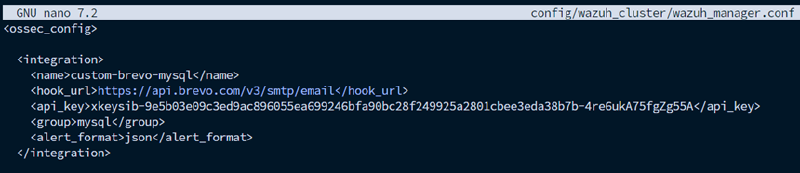
Kemudian, tambahkan element
nano config/wazuh_cluster/wazuh_manager.conf<ossec_config>
<integration>
<name>custom-brevo-mysql</name>
<hook_url>https://api.brevo.com/v3/smtp/email</hook_url>
<api_key>YOUR_BREVO_API_KEY</api_key>
<group>mysql</group>
<alert_format>json</alert_format>
</integration>
...
</ossec_config>Example output:
Mount file yang baru saja dibuat ke dalam volume Wazuh manager.
nano docker-compose.ymlservices:
wazuh.manager:
...
volumes:
...
- ./config/wazuh_cluster/wazuh_manager.conf:/wazuh-config-mount/etc/ossec.conf
- ./config/wazuh_cluster/integrations/custom-brevo-mysql:/var/ossec/integrations/c
ustom-brevo-mysqlExample output:

Jangan lupa recreate Wazuh manager dengan cara docker compose down dan up ulang untuk mengapply konfigurasinya.
docker compose down && docker compose up -dDi dalam wazuh manager, sesuaikan permission dan kepemilikan dari file-file yang baru saja ditambahkan.
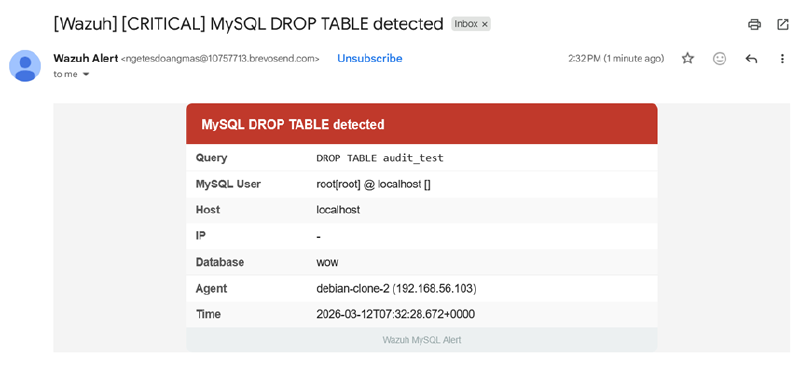
docker exec single-node-wazuh.manager-1 chmod 750 /var/ossec/integrations/custom-brevo-mysql
docker exec single-node-wazuh.manager-1 chown root:wazuh /var/ossec/integrations/custom-brevo-mysql
Berikut adalah contoh dari email yang berhasil terkirim: